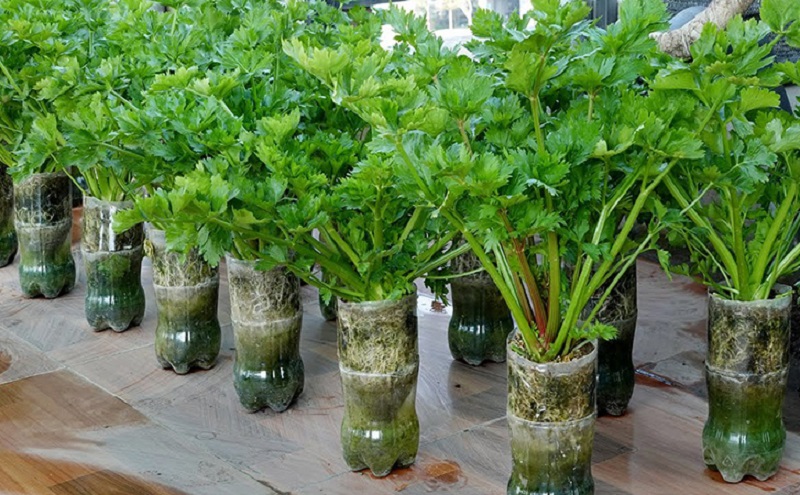
When the days grow shorter and the garden is winding down, I love having something green growing indoors. Celery is a wonderful choice: its crisp, fragrant stalks bring fresh flavor to soups, salads, and weeknight meals. And with a simple recycled plastic bottle planter, you can grow celery right on a sunny windowsill.
One of the easiest ways to get started is to regrow a store-bought celery plant rather than sowing seeds. Growing celery from seed can take patience, while a healthy celery base with its growing point intact may begin producing new roots and leaves much sooner. With a little water, potting mix, and a bright spot, you can enjoy fresh celery greens at home through much of the year.
Why Grow Celery Indoors?
Indoor celery is a practical little project for a kitchen or sunny windowsill. It doesn’t need a large garden bed, and a recycled bottle can serve as a compact planter with a built-in water reservoir.
Here are a few reasons I like this method:
⦁ It gives a celery base a second life instead of sending it straight to the compost.
⦁ You can snip fresh stalks and leaves for cooking.
⦁ It’s an inexpensive way to try indoor gardening.
⦁ The planter fits neatly on a bright windowsill.
⦁ The setup is simple enough for beginners and a fun project to do with children.
For the best results, choose a celery plant that still has a firm, healthy base and an intact central growing point. Celery may regrow differently depending on the condition of the base and the light and warmth in your home, so think of this as a convenient source of fresh greens rather than a guaranteed way to grow a full-sized grocery-store bunch.
What You’ll Need
Gather these supplies before you begin:
⦁ One fresh celery base with the bottom and central growing point intact
⦁ A clean plastic bottle, preferably large enough to hold a small celery plant
⦁ A clear drinking glass or small container for rooting
⦁ Water
⦁ Toothpicks
⦁ Potting mix for houseplants or vegetables
⦁ Scissors or a utility knife
⦁ A sunny windowsill
⦁ A saucer or tray, if needed to protect the sill
Use a clean bottle and make sure the planter can drain. If you use a knife or scissors to cut the bottle, work carefully and keep sharp tools away from children.
Step 1: Prepare the Celery Base
Cut or separate the stalks from the celery base, leaving the bottom rosette and central growing point intact. The growing point is the small center from which new leaves will emerge.
Place the base in a glass of water, using toothpicks to support it at the rim. Keep only about ½ inch (1 centimeter) of the bottom submerged. The center of the celery should remain above the water.
Set the glass in a warm, bright place, away from chilly drafts. Change the water if it becomes cloudy, and check the base regularly. Roots often begin to form in about 1–2 weeks, though timing can vary.
Step 2: Make a Bottle Planter
Once the celery base has developed roots, prepare your bottle planter.
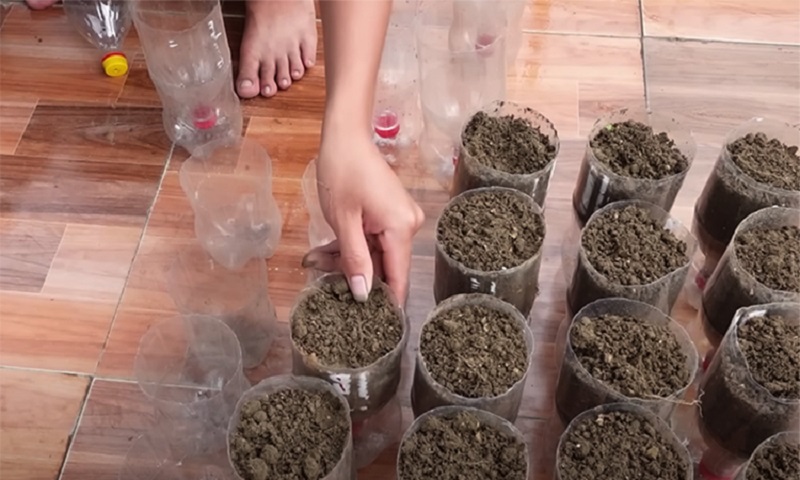
1. Wash and dry the plastic bottle.
2. Carefully cut off its top portion, roughly around the middle of the bottle.
3. Turn the top section upside down and fit it into the bottom section, creating a funnel-shaped planter.
4. Add potting mix to the inverted top section.
The lower part of the bottle can catch excess water, but it should not leave the roots sitting in water for long periods. If the top section has no drainage openings, make a few small holes before adding the potting mix. Empty standing water from the bottom as needed.
Step 3: Plant the Rooted Celery
Make a small opening in the potting mix and set the rooted celery base into it. Cover the roots and lower part of the base with about ½ inch (1 centimeter) of soil, leaving the central growing point uncovered.
Water gently with room-temperature water until the mix is evenly moist. Place the planter on a bright windowsill where the celery will receive plenty of indirect sunlight or several hours of gentle sun.
Step 4: Care for Your Windowsill Celery
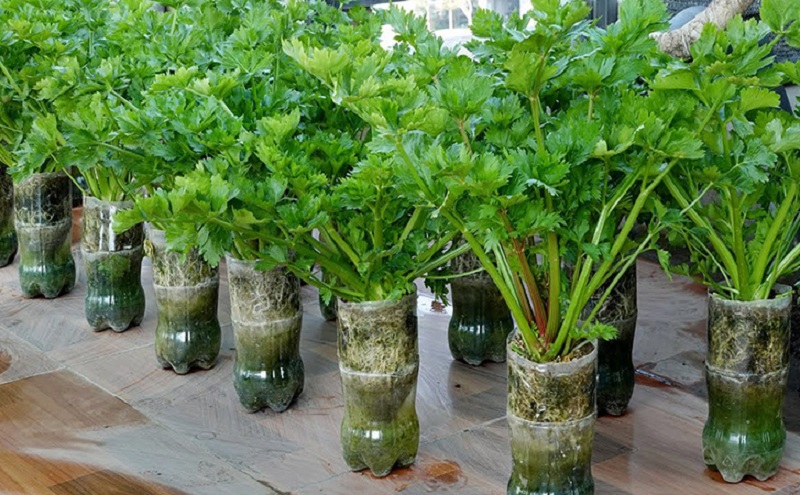
Celery likes consistent moisture. Water whenever the surface of the potting mix begins to dry, and don’t let the soil dry out completely. At the same time, avoid leaving the roots in waterlogged soil.
A few simple habits can help your indoor celery stay healthy:
⦁ Check the soil every day or two, especially in a warm room.
⦁ Water slowly so the mix absorbs moisture evenly.
⦁ Empty excess water from the bottle’s lower section.
⦁ Rotate the planter occasionally so the plant grows evenly toward the light.
⦁ Remove any yellow or damaged outer leaves.
⦁ Keep the planter away from cold drafts and heating vents.
If new growth looks pale or stretched, the celery may need a brighter spot. A grow light can help when autumn and winter days are especially dim.
When Can You Harvest?
In about 3–4 weeks after planting, you may be able to begin snipping young stalks and leaves. Harvest the outer growth as needed, and leave the central growing point in place so the plant can continue producing new leaves.
Use clean scissors and avoid cutting the entire plant down at once. A modest harvest gives the celery a better chance to keep growing.
The regrown plant may not produce stalks as thick as those from a mature outdoor crop, but its tender greens are lovely in soups, salads, egg dishes, and homemade stocks.
Troubleshooting Common Indoor Celery Re-Growing Problems
|
What you notice |
What to check |
| The celery base is soft or smells unpleasant | It may be sitting in too much water. Remove damaged tissue and refresh the water or potting mix. |
| Roots haven’t appeared after two weeks | Check that the base is fresh, the water is clean, and the room is warm enough. Some plants take longer. |
| New leaves look pale or stretched | Move the planter to a brighter windowsill or add a grow light. |
| The potting mix dries out quickly | Check it more often and water when the surface begins to dry. |
| Water collects in the bottle’s lower section | Empty excess water so the roots don’t remain submerged. |
| Growth is slow | Indoor light and temperature can affect growth. Keep conditions steady and give the plant time. |
| Tiny black flies buzzing around the plant (Added) | Look for fungus gnats thriving in overwatered soil or stagnant water. Let the soil dry out slightly between waterings or change the water more frequently. |
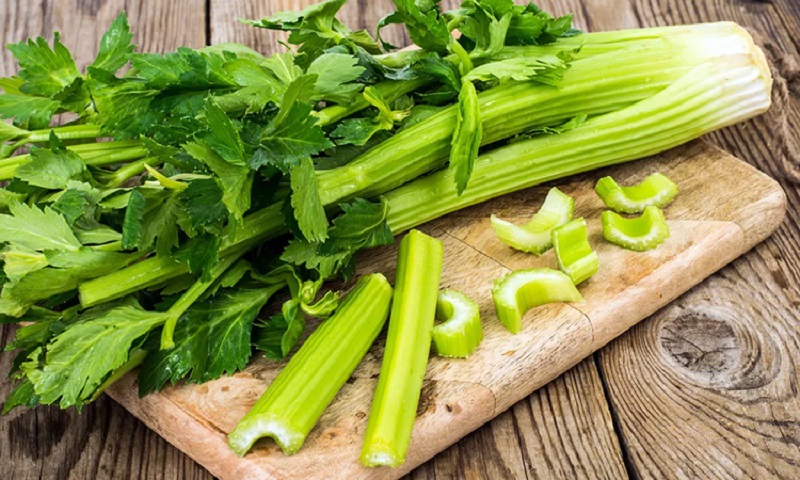
A Simple Way to Keep Fresh Greens Close
Growing celery in plastic bottles is an easy, space-saving way to add a little greenery to your kitchen during autumn and beyond. Start with a healthy celery base, give it time to root in water, then plant it in a bottle planter with moist, well-draining soil. With a bright windowsill and regular watering, you may be able to snip fresh young celery in just a few weeks.
I love projects that turn an everyday kitchen scrap into something useful. A little bottle planter by the window may not replace a whole garden harvest, but it can make fresh celery greens feel wonderfully close at hand.